Tutorial: a to-do app
 This tutorial builds a small to-do app with intuiTUIve in eight steps. Each
step adds one idea:
| Step | You add | You learn |
|---|---|---|
| 1 | A project | the template, and running an app |
| 2 | A list on screen | nodes and layout |
| 3 | Real state | signals, each, memo |
| 4 | An entry box | components and focus |
| 5 | Ticking and deleting | keys on nodes, a modal |
| 6 | Styles | themes and the theme file |
| 7 | Tests | the headless driver |
| 8 | A look inside | the inspector |
The finished app is
examples/todo.rs,
and the tests in tests/todo.rs drive it the way this page does. To try it
first:
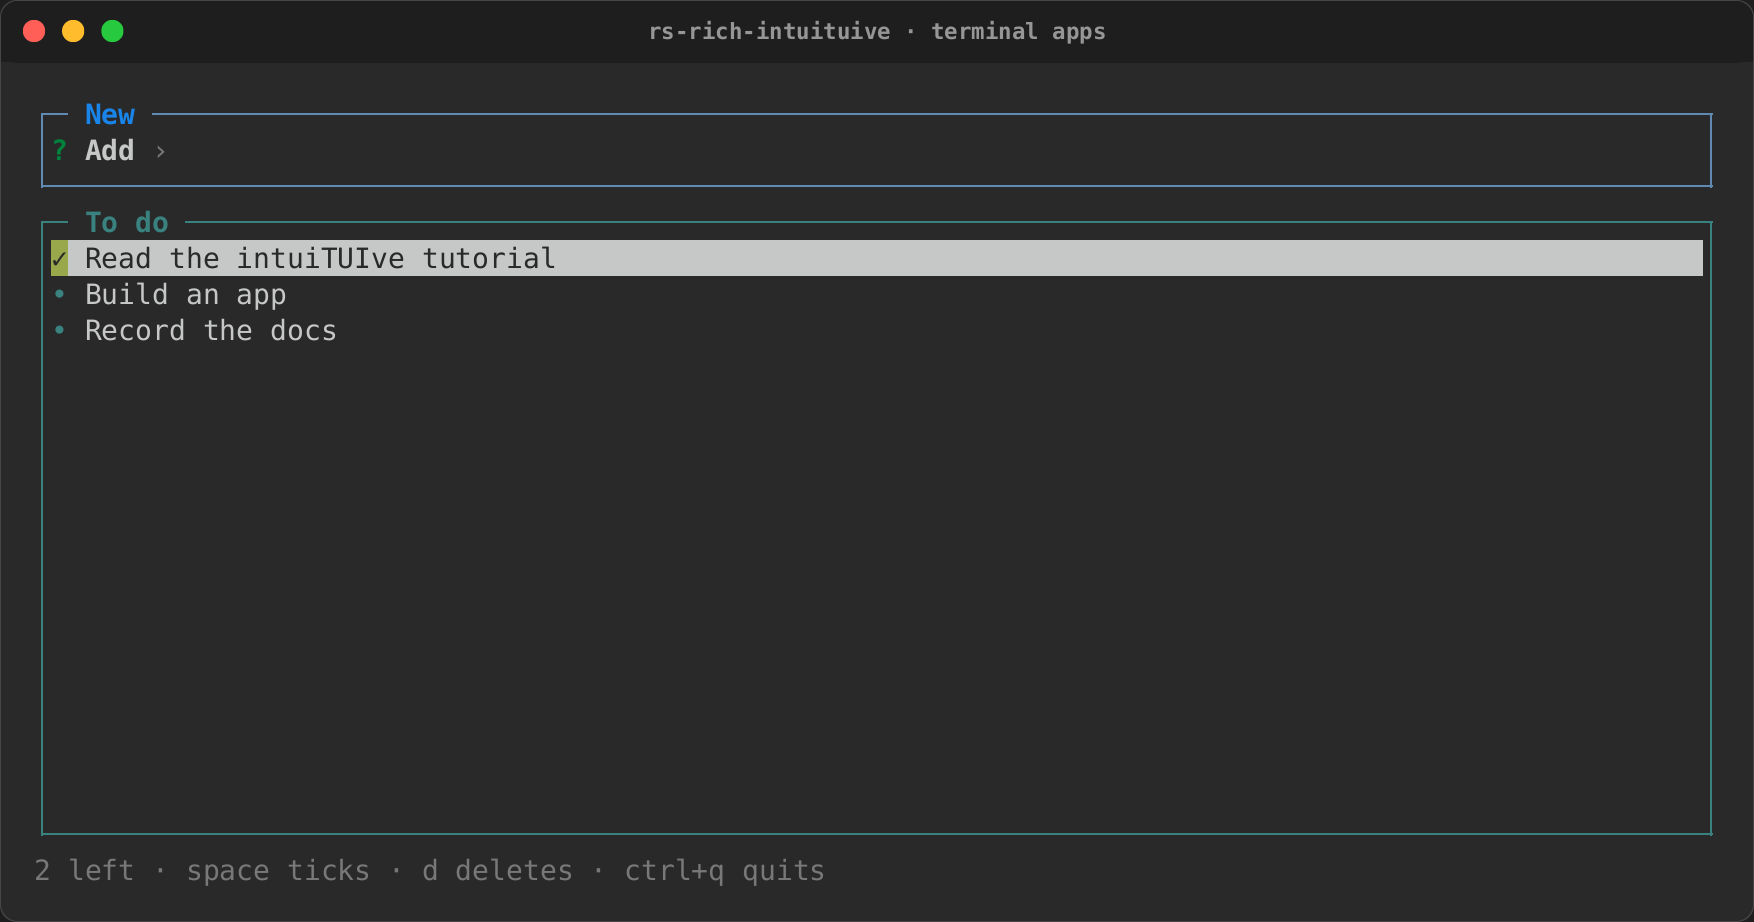
Or run it here, in the browser: the same app, compiled to WebAssembly, on
the to-dos in the box (one per line). Type one and Enter adds it, Tab moves
to the list, Space ticks, d deletes.
1. A project
Start from the template:
cargo install cargo-generate
cargo generate --git https://github.com/buchochelliq-labs/rs-rich-cli templates/intuituive-app --name todo
cd todo
cargo run
Or add the crate to a project of your own:
One dependency is enough: intuituive::rich is rs-rich (renderables,
styles, markup) and intuituive::interact is rs-rich-interact (components
such as Input and Select).
Replace src/main.rs with the smallest app there is:
use intuituive::prelude::*;

fn main() -> std::io::Result<()> {
    App::new(|| label("Hello").on_key("ctrl+q", |cx| cx.quit())).run()
}
App::new takes a closure that runs once. It builds the screen as a
tree of nodes and returns the root. run takes over the terminal until a
handler calls cx.quit() (Ctrl+C always quits too).
2. A list on screen
App::new(|| {
    column([
        label("• milk\n• eggs").panel("To do"),
        label("[dim]ctrl+q quits").auto(),
    ])
    .on_key("ctrl+q", |cx| cx.quit())
})
columnstacks its children;rowputs them side by side..panel("To do")draws a border with a title round a node.- Sizes are set on the children.
.auto()means "as tall as your content", so the help line takes one row. A child with no size shares what is left, so the panel fills the rest. - Labels take console markup:
[dim]…[/],[b]…[/], colours, links.
3. Real state
The list should come from data. Keep the to-dos in a signal:
#[derive(Clone, Debug, PartialEq)]
pub struct Todo {
    pub id: u32,
    pub title: String,
    pub done: bool,
}

App::new(move || {
    let todos = signal(start);
    let left = memo(move || todos.with(|t| t.iter().filter(|t| !t.done).count()));

    let list = each(
        move || todos.with(|t| t.iter().map(|t| t.id).collect()),
        move |id| todo_row(todos, id),
    );

    column([
        list.panel("To do"),
        text!("[muted]{left} left · ctrl+q quits").auto(),
    ])
    .on_key("ctrl+q", |cx| cx.quit())
})
signal(value)holds state.get(),with(|v| …),set(v)andupdate(|v| …)read and write it. Signals areCopy: move them into as many closures as you like.- A node that reads a signal while it draws subscribes to it. When the signal changes, that node draws again, and only that node.
memoderives a value. Its readers update only when the result changes, soleftredraws the footer only when the count moves.each(keys, build)shows one child per key. Here the keys are the to-dos' ids, so a row keeps its identity (and its focus) when others are added or removed.buildruns once per new key.
Each row reads only its own to-do, through a memo:
fn todo_row(todos: Signal<Vec<Todo>>, id: u32) -> Node {
    let todo = memo(move || todos.with(|t| t.iter().find(|t| t.id == id).cloned()));
    text(move || match todo.get() {
        Some(todo) if todo.done => format!("[good]✓[/] [muted strike]{}[/]", escape(&todo.title)),
        Some(todo) => format!("[accent]•[/] {}", escape(&todo.title)),
        None => String::new(),
    })
}
Ticking one to-do changes todos, but only the row whose todo memo
changed draws again. escape (from intuituive::rich::markup) keeps a
title like [x] from being read as markup.
4. An entry box
New to-dos are typed into an Input, one of rs-rich-interact's components:
use intuituive::interact::Input;

let entry = repeating(
    || Input::new("Add"),
    move |title: String, _| {
        let title = title.trim().to_string();
        if !title.is_empty() {
            todos.update(|t| {
                let id = t.iter().map(|t| t.id).max().unwrap_or(0) + 1;
                t.push(Todo { id, title, done: false });
            });
        }
    },
);

column([
    entry.panel("New").fixed(3),
    list.panel("To do"),
    text!("[muted]{left} left · ctrl+q quits").auto(),
])
component(c, on_done)puts any component in the tree. It takes keys while it has the focus, shows the text caret, and callson_donewith its answer.repeating(make, on_done)does the same, but builds a fresh component after each answer, so the entry is empty again for the next to-do.- The entry is the first focusable node, so it has the focus when the app starts: type, press Enter, and the to-do appears.
.fixed(3)gives the panel exactly 3 rows: the input and its border.
5. Ticking and deleting
Rows become focusable, take keys, and ask before deleting:
text(move || /* as before */)
    .focus_style("reverse")
    .on_key("space", move |_| {
        todos.update(|t| {
            if let Some(todo) = t.iter_mut().find(|t| t.id == id) {
                todo.done = !todo.done;
            }
        })
    })
    .on_key("d", move |cx| {
        cx.modal(Size::Auto, Size::Auto, move || confirm_delete(todos, id))
    })
.focus_style("reverse")puts the row in the Tab order and highlights it while it has the focus. Tab and Shift+Tab move between the entry and the rows.on_keybindings run when the node, or a node inside it, has the focus. A key nobody uses bubbles up to the parents, which is whyctrl+qon the root column works from anywhere.cx.modal(width, height, build)opens a box over the app.Size::Autosizes it to its content. Keys go to the modal until it closes.
fn confirm_delete(todos: Signal<Vec<Todo>>, id: u32) -> Node {
    let title = todos.with_untracked(|t| {
        t.iter().find(|t| t.id == id).map(|t| t.title.clone()).unwrap_or_default()
    });
    label(format!("Delete “{}”? [b]y[/] / [b]n[/]", escape(&title)))
        .padding(0, 1)
        .panel("Delete")
        .on_key("y", move |cx| {
            todos.update(|t| t.retain(|t| t.id != id));
            cx.pop();
        })
        .on_key("n esc", |cx| cx.pop())
}
cx.pop() closes the modal, and the focus goes back where it was (or
where a cx.focus(x) made just before cx.modal(..) put it).
with_untracked reads without subscribing: the modal's text does not need
to follow later changes.
6. Styles
The markup used names rather than colours (accent, muted, good), so
the look is set in one place. The default theme defines them; change them
in code:
use intuituive::rich::Style;

todo_app(start).theme(Theme::dark().style("accent", Style::parse("bold magenta").unwrap()))
or in a file the app watches:
Save the file while the app runs and it redraws in the new styles. A typo
leaves the last good styles in place; the inspector
says what is wrong. Theme::light() and Theme::mono() are the other
presets, and cx.set_theme(theme) switches at run time.
7. Tests
Apps run without a terminal under rs-rich-interact's headless driver, which plays a script of keys and records every frame:
use intuituive::interact::headless::{Headless, Script};

#[test]
fn space_ticks_off_the_focused_todo() {
    let start = vec![Todo::new(1, "milk"), Todo::new(2, "eggs")];
    let script = Script::new().keys("tab tab space ctrl+q");
    let mut backend = Headless::new(script, 50, 12);
    let record = backend.record();
    todo_app(start).run_on(&mut backend).unwrap();
    let frame = record.borrow().last_frame().to_string();
    assert!(frame.contains("✓ eggs"));
    assert!(frame.contains("1 left"));
}
For a quick check, app.render_with(&["a", "enter", "ctrl+q"], 50, 12)
returns the last screen as lines. Scripts can also type text
(.text("milk")), click, resize and wait on a virtual clock, and
App::wait_for_tasks(true) makes background work finish before the next
step.
8. A look inside
The inspector docks on the right (F12 shows and hides it). It shows the
node tree as it is, with sizes; the nodes that drew in the last frame in
yellow; the focused node reversed; and what the frame cost, in nodes drawn,
damaged cells and bytes sent. Tick a to-do and one row and the footer draw,
nothing else. Name the nodes you care about with .name("entry") to find
them in the tree.
Shift+F12 gives the inspector the keys (Esc gives them back). The arrows
select a node, outlined on the app, and Enter shows where it is, its size,
its focus and its states; p picks one by pointing at it. Pane 4 is the
trace: tick a to-do and it shows the key, the binding that took it, and the
signal it wrote, with the nodes that write made dirty. The
inspector section has every key.
Where next
- Terminal apps: the overview, with a map of the guide's pages.
- Screens, pop-ups and toasts:
cx.push(build)opens a full screen over the app, andcx.pop()goes back. - Tasks, feeds and other threads:
spawn,spawn_futureandresourceload data without freezing the app. - Inline apps:
App::inline(rows)runs in a few rows under the prompt. - Testing and the inspector: snapshots of the screen, and every inspector key.